What do you do when your Mother tells you not to get her anything for her birthday? When she says she doesn't need anything and to save your money? When she tells you that if you got her something to take it back?
Well. You make her something that she can't take back and she can't resist!
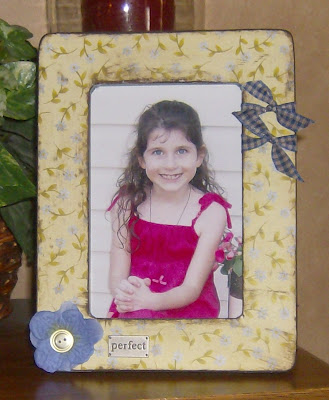
What grandmother could refuse a picture of her favorite ;) granddaughter in a frame made by her favorite ;) daughter?
Not my Mother. Not when I used her favorite picture of Allison.
Not only was I able to give my Mother a birthday gift without the hassle of "you should not have" but it also cost me $1! That's right friends! I bought the unfinished craft frame at the craft store for $1! All of the other supplies I had in my scrapbooking/craft stash and it only took me under an hour to make! I say it was a win-win situation!
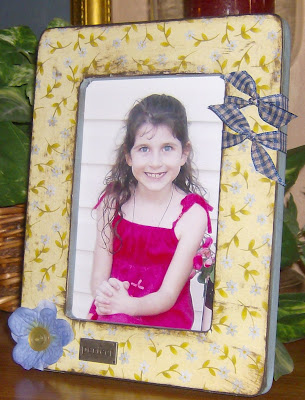
Here it is! You can click on the pictures to get a closer look.
 The Supplies: unfinished craft frame, acrylic paint, 1 sheet of scrapbooking paper, ink pad, ribbon, silk flowers from a Dollar Tree flower bush, a button and a metal word plaque.
 The Tools: a foam craft brush, scissors, a pencil, Xyron adhesive, a sanding paper block and a hot glue gun.
1. Paint the outside, inside and back of the frame using a foam brush with two coats of acrylic paint.
2. After the frame is dry, lay it down on the scrapbooking paper face down and trace the outside and inside of the frame. It doesn't have to be perfect...just get it as close to the edge as possible.
3. Run the paper through a permanent adhesive Xyron machine to adhere the adhesive. You could also foam brush a thin layer of white glue on the back.
4. Using a sanding paper block or sand paper, sand the edges of the paper until it is smooth with the edges of the frame.
5. Antique the outside and inside edges of the frame using the ink pad. Rub a little on the front of the paper to give it that aged look.
6. Tie two pieces of ribbon around the frame. I actually hot glued it a little the the inside ledge where the photo goes so it wouldn't interfere with the photo placement. The ribbon I had was white and bright blue and too bright so I rubbed it on the ink pad to tone down the white and blue.
7. Hot glue the flowers to the frame and then hot glue the button to the center of the petals. I also rubbed the button on the ink pad to age it a little.
8. Add the word plaque. My word plaque already had double stick tape on the back but you probably could hot glue that on too.
9. Put your favorite photo in the frame and you're done!


3 comments:
That is adorable Cindi! Way to go. :)
The frame and pic. is sooooo cute, looks like a good idea for craft night. Love Allison"s pink top in BABA birthday picture. Your mom looks good.
OMG, Cindi, it's beautiful!!! Looks like a future craft nite idea.....;)
Susan
Post a Comment